Hello my loves!
This week I want to share this wonderful idea I have found on pinterest. I love going to the nail salon and getting a gel manicure, but who am I kidding my budget will not allow me to spend $40 every two weeks. So I browsed on something I could do myself at home, and thank goodness for Pinterest I found the perfect thing.
The Sweetest Thing is where I found this marvelous idea. She explained how the process is a bit long, but the polish will last longer than a regular manicure, AND there is NO UV light! So let's get started!
What you need:
- Gelous Advanced Nail Gel Coat (I purchased mines at Sallys at about $5.49)
- Any nail polish of your choice (I used one I already had I used Wet N Wild's Megalast in Sugar Coat)
- Any top coat (I used Seche Vite Dry Fast Top Coat)
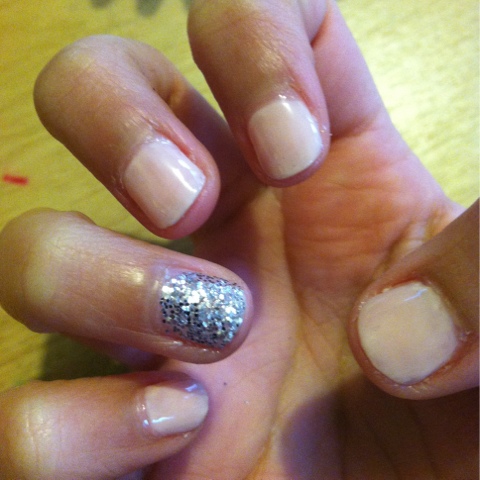
- And a little glitter from the crafts store and something to dip your nail in (I used a coffee filter)
Here are the steps:
- Apply a thin coat of the Gelous polish and wait 2 minutes, and then apply another coat and wait another 2 minutes.
- Apply a thin coat of nail polish (and I mean a THIN coat, because you will add more) and let that dry for 4 minutes
- Now on the nail you want to add glitter don't let THAT nail dry completely, dip your finger in the glitter and shake off the excess. I would squeeze a little bit of the glitter on the nail so it's flat.
- Apply another layer of Gelous and let that dry for 2 minutes (except on the nail with the glitter, continue to let that dry.)
- Apply one more layer of nail polish and let that dry for 4 minutes
- Apply your top coat, and let it dry.
And that's it! It took me about an hour to do my gel manicure, and since I already had nail polish and a top coat, all I paid for was my Gelous polish! So it only cost me $5 for this manicure, after this it's always going to be free! Now how can you beat that?
I will say though, if you work a lot with your hands it might chip off a little the next day. I'm a cake decorator, so this always happens, but most of my nails stay completely polished for about a week.
I hope this helped my loves, and I hope this helps some of you save some money :)
Have a wonderful rest of the week! ♥